
As I cleated-off the last dock line, having returned SV Scat! safely to the Marina Bay Yacht Harbor, we reflected on all that happened during the past 12 days while Scat was in the KKMI boat yard.
I had been a little nervous when we motored the relatively short distance from the Marina Bay Yacht Harbor to the KKMI boatyard, as we had removed the main (and only) sail the previous afternoon. Without the sail, we had no “plan B” if the iron genoa stopped unexpectedly as we negotiated our way through the expected tankers and cargo ships maneuvering to and from the docks of Port Richmond’s inner harbor. Fortunately, the few tankers and cargo ships there were were already docked by the time we set off for KKMI.
When we had originally met with our KKMI project manager, we had requested that the boatyard: pull the mast and replace the rigging, install a dripless shaft seal, and install our manual windlass. We had also planned to replace the mast lights with LED, install a new VHF antenna and cable, and install a mast-top wind speed / direction indicator ourselves. As with most boatyard projects, this simple list grew considerably and stretched what we thought would be about a week to 12 days.
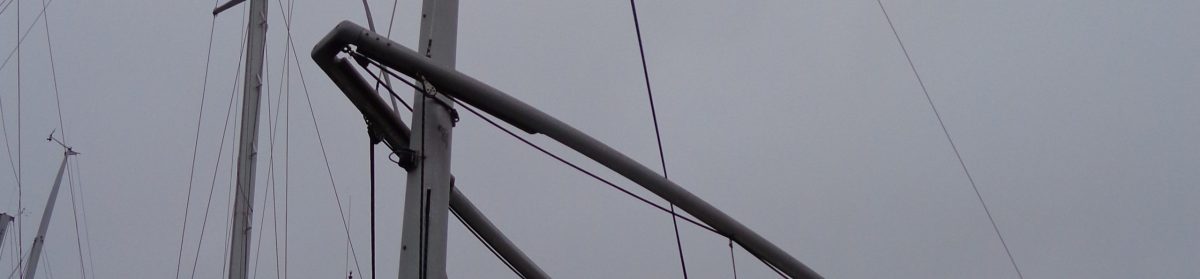
First up on this Friday – mast removal! KKMI’s expert rigger removed the hangers and topping lift from our wishbone boom and placed the boom on makeshift stands on deck. As I removed the bolts, pins, and leash that affixed the mast to hull, the rigger worked diligently to remove the wedge blocks that held the mast firmly to the deck collar. This turned out to be more of a chore than we had expected! Even with a gentle tug from the mast crane, the mast didn’t break free from the blocks. It took more than an hour of chiseling, hammering, and wiggling to free the mast. Upon completion of this intermediary task, the mast was expertly lifted from Scat and placed on stands in the boat yard. We had officially become the motor vessel Scat!

The plan was to haul the boat the following Monday, so we spent the rainy weekend tracking down and installing new anchor, running, and steaming light fixtures and LED festoon bulbs. We also consulted with a local marine electronics expert and ordered a new VHF antenna and coax cable, as well as a new B&G Triton wind instrument. We installed this equipment in our “spare” time over the ensuing week.
When we awoke on Monday, the KKMI crew were already busy with the many boats and projects in the yard. After a quick discussion with our project manager, the rigger hoisted the boom from our deck, we motored over to the travel lift. It always makes us nervous seeing our little boat swinging from the lift straps.
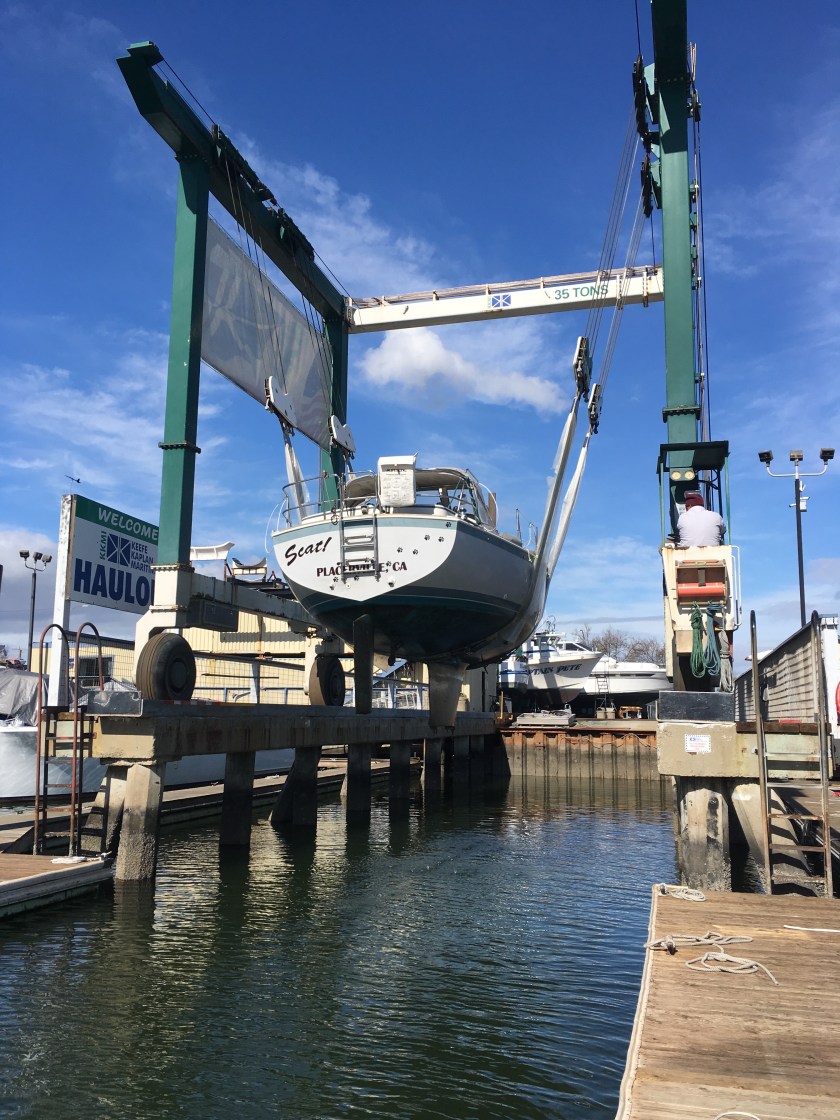
After a quick power wash, we were able to inspect Scat’s underside. It had been about 19 months since we had the boat hauled and painted in Vallejo. During this time, we had accumulated a surprising amount of growth – especially on the propeller. In fact, the prop was sporting an entire ecosystem.

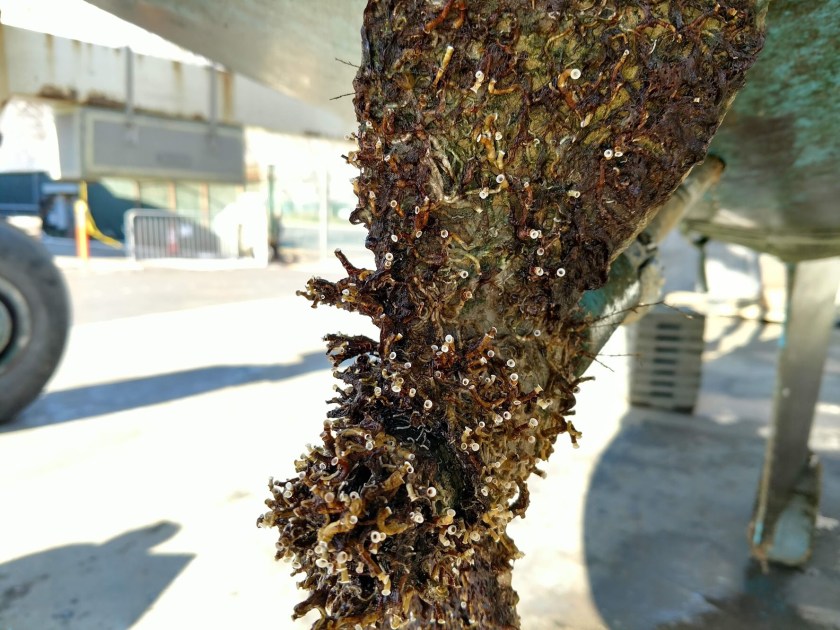
[We think they are tubeworms.]
It was also evident that prop shaft zincs would need replacing. I had installed two zincs during the previous haul out, but only one remained loosely attached to the shaft. We also observed barnacles starting to spread out from the bottom of the keel. In addition to new cathodic protection, Scat was going to need new bottom paint and propeller sealant. The KKMI team would have time to complete this work while the the dripless shaft seal was being installed.
After the pressure wash, Scat was shuttled over to an open space in the yard and placed on three sets of stands. Our boat listed slightly to port as shewas placed on the stands. While this didn’t appear to matter, it made us nervous every time we climbed the ladder to board. And, we lived on the boat for a week while it was on the stands, so we did quite a lot of ladder climbing.
Installation of a dripless shaft seal turned out to be quite a project. But it wasn’t actually the installation;rather, the difficulty was in separating the propeller shaft from the coupler. It took the experienced mechanic more than two days to separate these two parts and extract the shaft from the boat. The mechanic patiently worked on this project while contorting his body around in our engine “room.” Fortunately, installation proceeded on a more expeditious pace. However, the final test wouldn’t occur until Scat was splashed back in the water and a proper leak check completed under power.

While the mechanic worked diligently from our bilge, we installed the mast lights and ran the coax and wind transducer cables through the mast. We also purchased and installed several new blocks for the halyard, topping lift, and choker. Not wanting to risk extracting the internal halyard from the mast, we agonized for several days (well, I agonized – Laurie was a little more blasé). about how to install the new block. We searched far and wide for a block that could separate similar to climbing pulleys that I’ve used previously for mountain rescue. In the end, we tied a tag line to the end of the halyard and pulled it through the 49 ft mast. This was surprisingly easy, and within just a few minutes, we had the old block removed, the new block installed, and the halyard rerouted through the mast. Apparently, like many things in life, I anguished about this for nothing!
Soon after the shaft seal project was completed and the bottom paint was touched-up, Scat was again hoisted by the giant straps of the 35 ton travel lift (affectionately know as Ella Liftsgerald) and carefully lowered into the water with our mechanic onboard. Fortunately, after about an hour of inspection, including running up and down the channel under power, we were deemed leak-free so we docked near the mast crane.
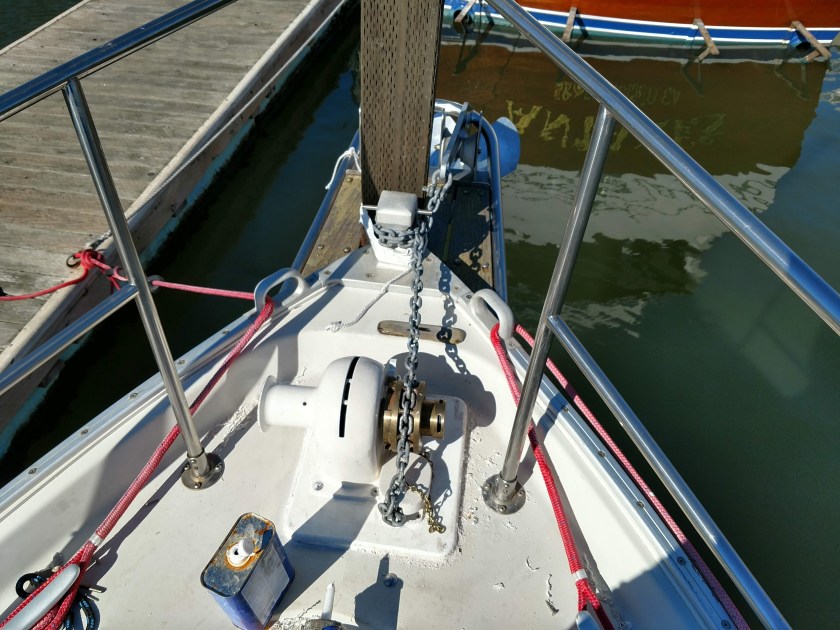
Next up, installation of the RC Plath manual windlass that Laurie inadvertently purchased last summer. Everyone agreed that this project would be easier to complete with mast removed since this would provide mostly unfettered access to the chain locker. The same mechanic that installed the dripless shaft seal was assigned our windlass project. Given the stoutness of our forward deck, as evidenced by the lifting of the boat during the initial attempt to extract the mast, the project consisted of constructing a mounting platform with a small piece of starboard and aligning the new hawse pipe with the original hawse pipe hole. Once accomplished, it was simply a matter of gluing and bolting the whole assembly down (I’m making it sound easier than it actually was). The final placement was perfect and will allow me to lower and raise the anchor without wracking my knuckles on the mast!
The final project was to re-step the mast, affix the wind transducer, attach the boom, and figure out how all of the lines and blocks attach to the mast and deck fittings. The prudent thing would have been to snap several clear photos before the mast was pulled. Yes, that would have been a good idea! However, between the cryptic drawings in the owners manual and a bit of common sense, the three of us (me, Laurie, and the KKMI rigger), were able to reassemble the important parts of the running rigging. With the mast back in place – even though the sail still filled the back of our vehicle – we shed the M/V moniker!
In the end, we completed the following projects during our 12 days in the boatyard:
- Install new topping lift and boom hangers
- Install new VHF antenna and coax
- Install new mast top wind instrument and cabling
- Replace anchor, running, and steaming lights with LED fixtures
- Replace pendant line block
- Replace halyard block
- Replace topping lift and a choker blocks
- Remove prop shaft, replace the cutlass bearing, and install a new dripless shaft seal
- Sand hull and apply new bottom paint
- Clean propeller and apply an anti-growth sealant
- Install new aluminum-based prop shaft cathodic protection (formerly zinc’s)
- Remove old knot meter and insert a plug with new O-rings
- Install new manual windlass
We were both amazed at how fast our little craft moved through the water as we motored back to our slip in the Marina Bay Yacht Harbor.

A lot of projects completed in a relatively “short” time span. Well done!!!
LikeLike